Preparing Your Garage for Floor Coating Installation: Steps for a Smooth Process
June 12, 2024
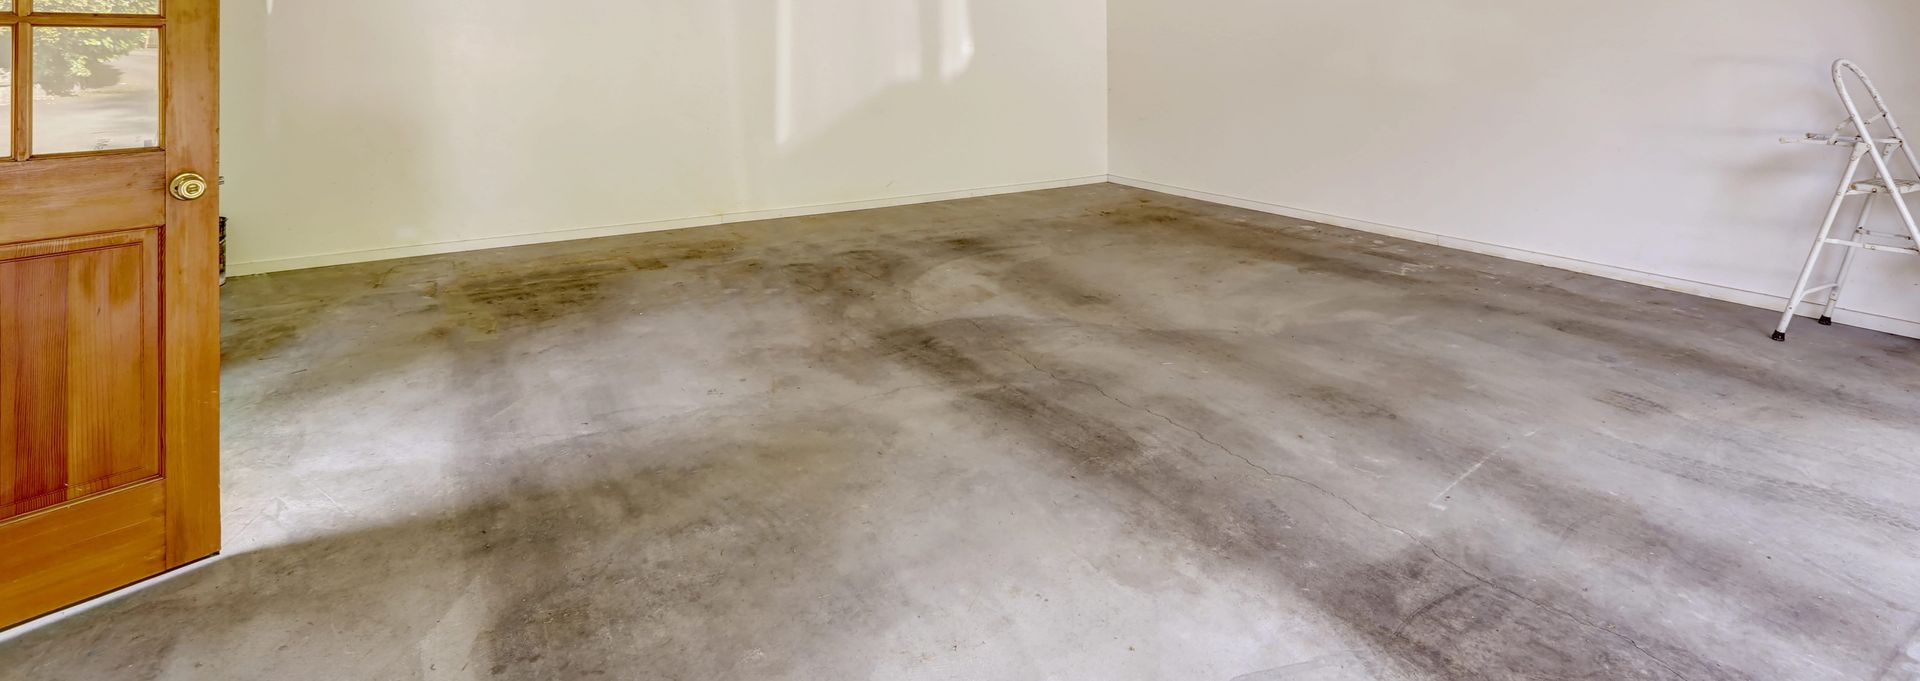
Had enough of that boring, stained garage floor?
Are you ready to transform it into a sleek, durable surface that enhances both the look and functionality of your space? If so, then installing a floor coating is the perfect solution. However, before diving into this exciting project, it's essential to ensure that your garage is properly prepared. In this guide, we'll walk you through the steps for preparing your garage for floor coating installation, ensuring a smooth and successful process from start to finish.
Clear Out the Clutter:
The first step in preparing your garage for floor coating installation is to clear out any clutter. Remove vehicles, tools, storage items, and any other belongings from the garage. This will give you ample space to work and prevent any damage to your belongings during the coating process.
Clean the Surface:
Next, thoroughly clean the garage floor to remove any dirt, oil, grease, and other contaminants. Use a degreaser and a stiff-bristled brush to scrub the surface, paying particular attention to any stains or heavily soiled areas. Rinse the floor thoroughly with water and allow it to dry completely before proceeding.
Repair Any Damage:
Inspect the garage floor for any cracks, pits, or other damage. Repair any imperfections using a concrete patching compound or epoxy filler. Smooth out the repaired areas with a trowel and allow them to cure according to the manufacturer's instructions. This will ensure that your floor is smooth and level before applying the coating.
Etch the Surface:
To promote proper adhesion of the floor coating, it's essential to etch the surface of the concrete. You can use a commercial concrete etching solution for this purpose, which is typically a mixture of water and acid. Apply the etching solution to the floor according to the manufacturer's instructions, then scrub the surface with a stiff-bristled brush. Rinse the floor thoroughly with water and allow it to dry completely before proceeding.
Protect Walls and Baseboards:
Before applying the floor coating, it's essential to protect the walls and baseboards of your garage to prevent any accidental spills or splatters. Use painter's tape and plastic sheeting to cover these areas, ensuring that they are fully protected during the coating process.
Choose the Right Coating:
When selecting a floor coating for your garage, consider factors such as durability, chemical resistance, and aesthetic appeal. Epoxy and polyurethane coatings are popular choices due to their long-lasting durability and easy maintenance. Take the time to research different coating options and choose the one that best suits your needs and preferences.
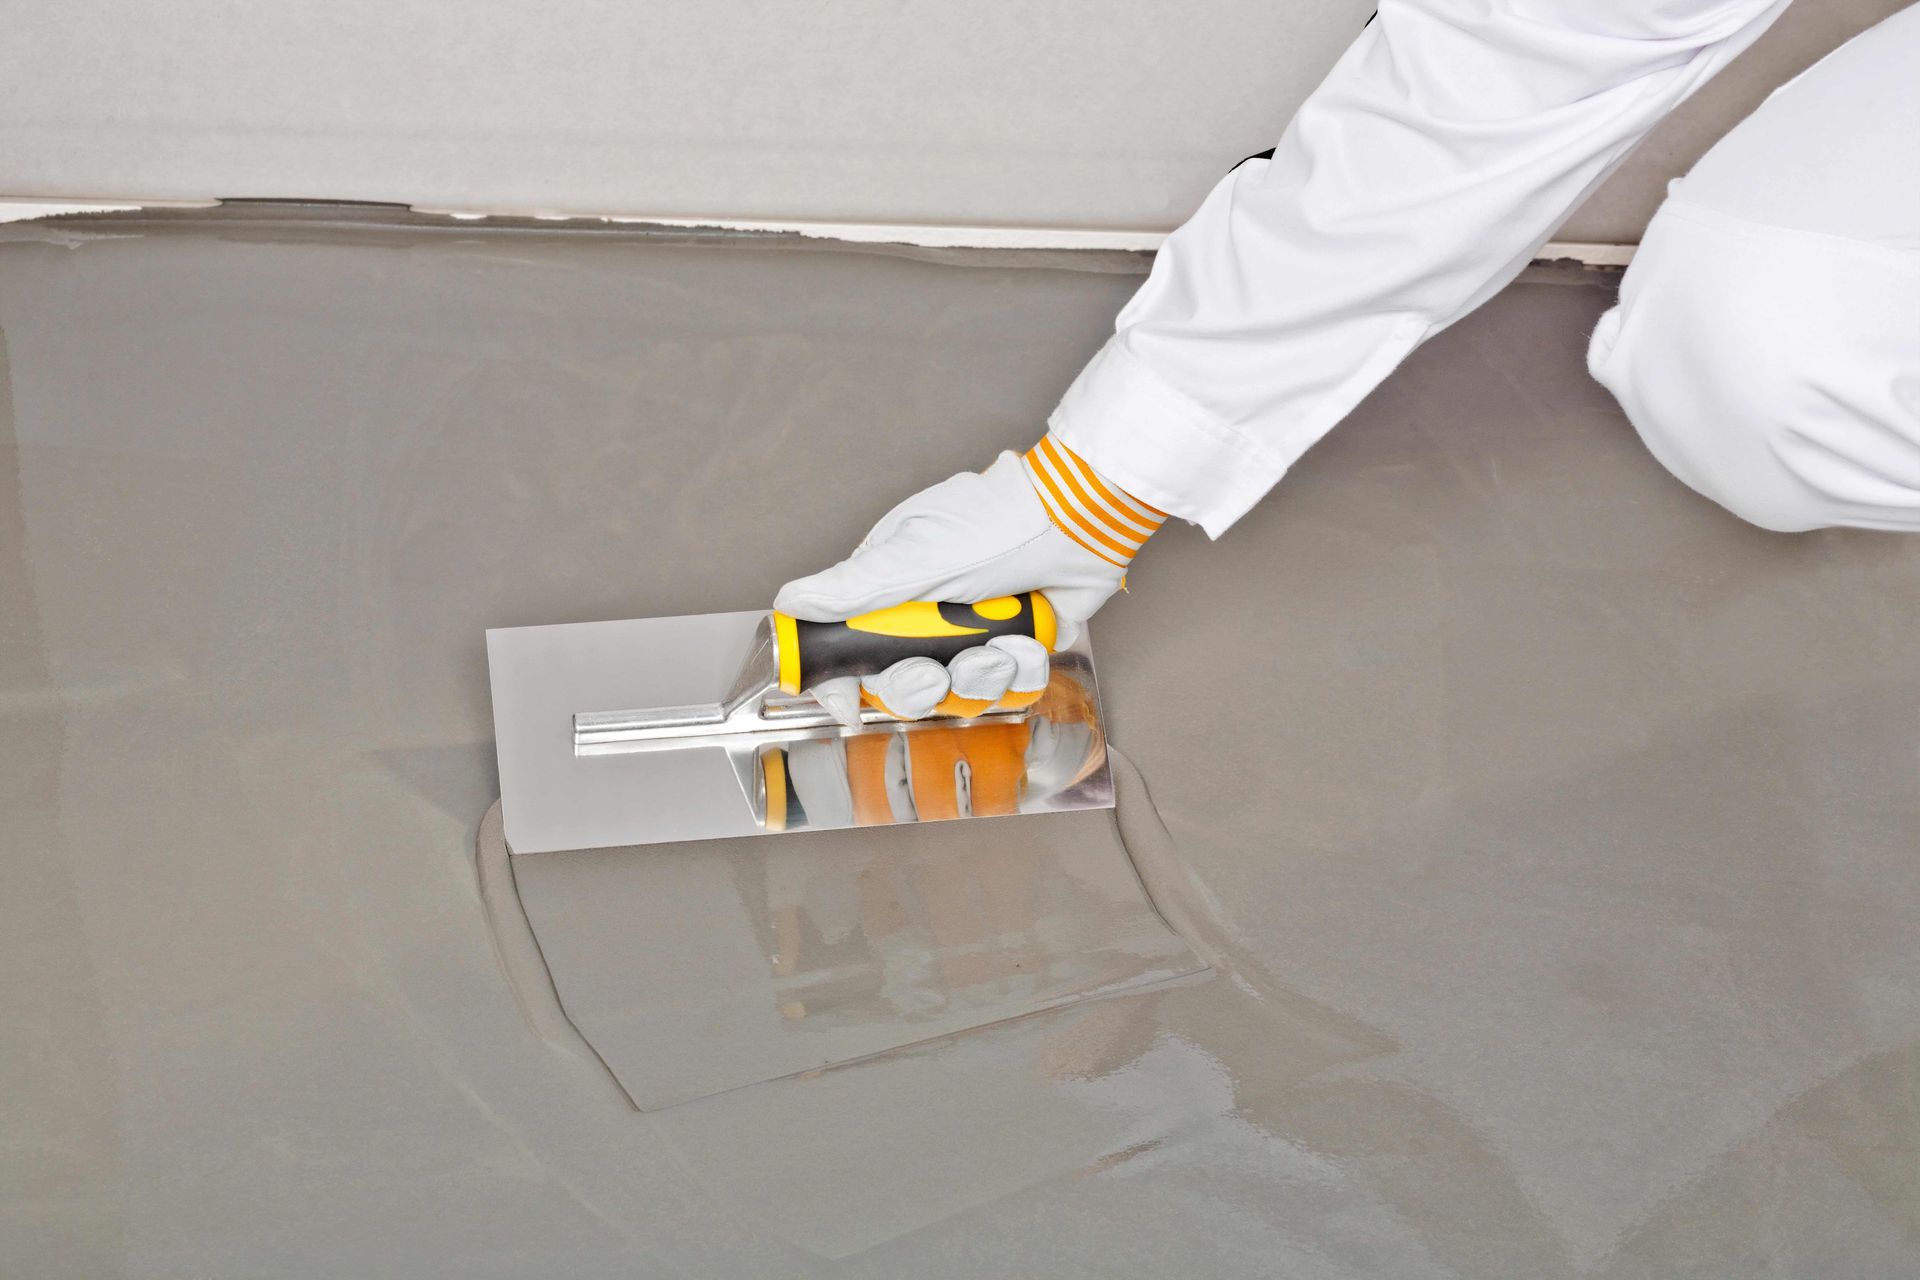
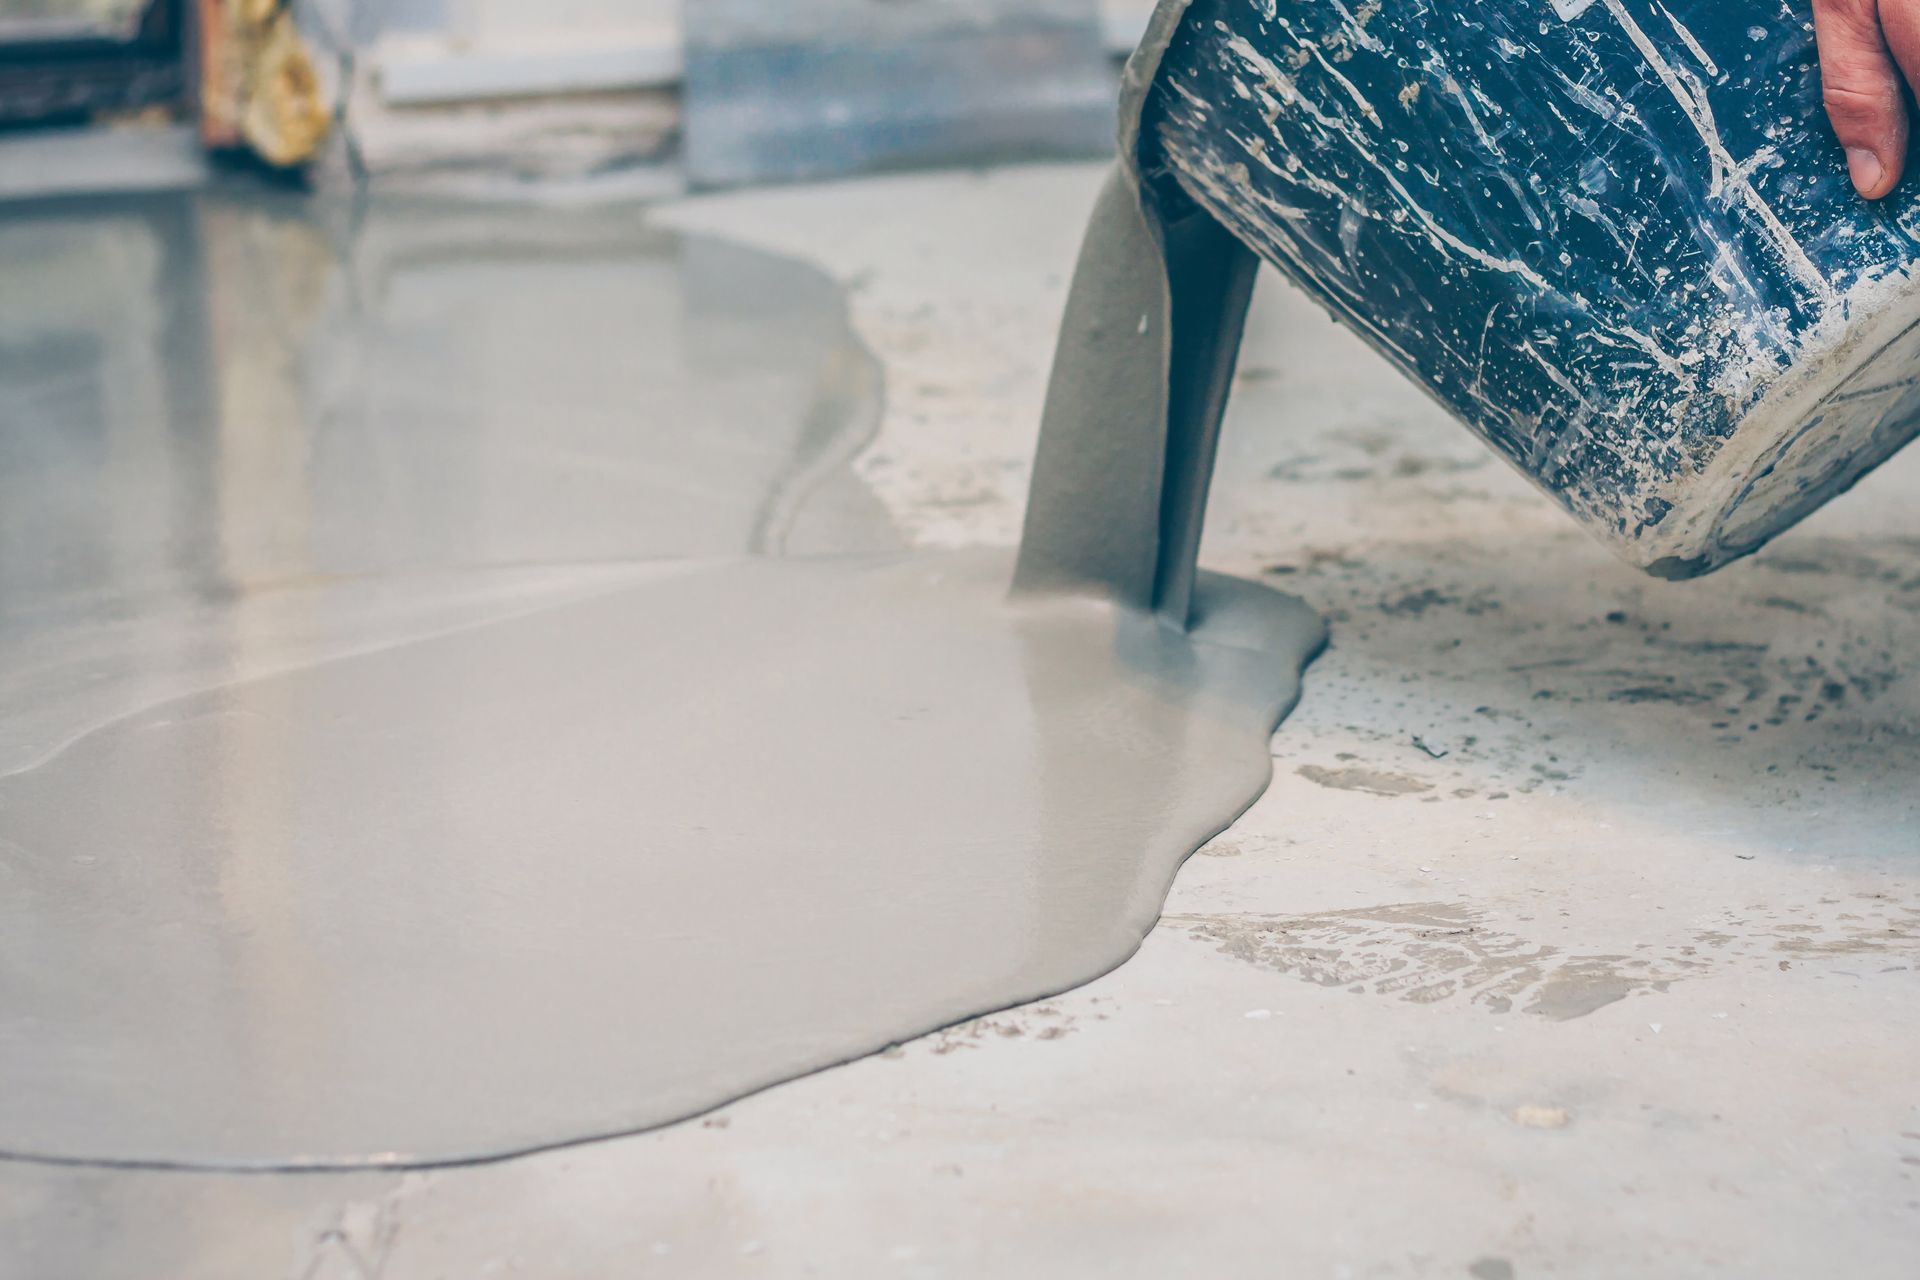
Follow Application Instructions:
Once you've chosen the right coating for your garage floor, carefully follow the manufacturer's instructions for application. This may involve mixing the coating components, applying multiple coats, and allowing sufficient drying time between coats. Be sure to work methodically and evenly to achieve a smooth, professional-looking finish.
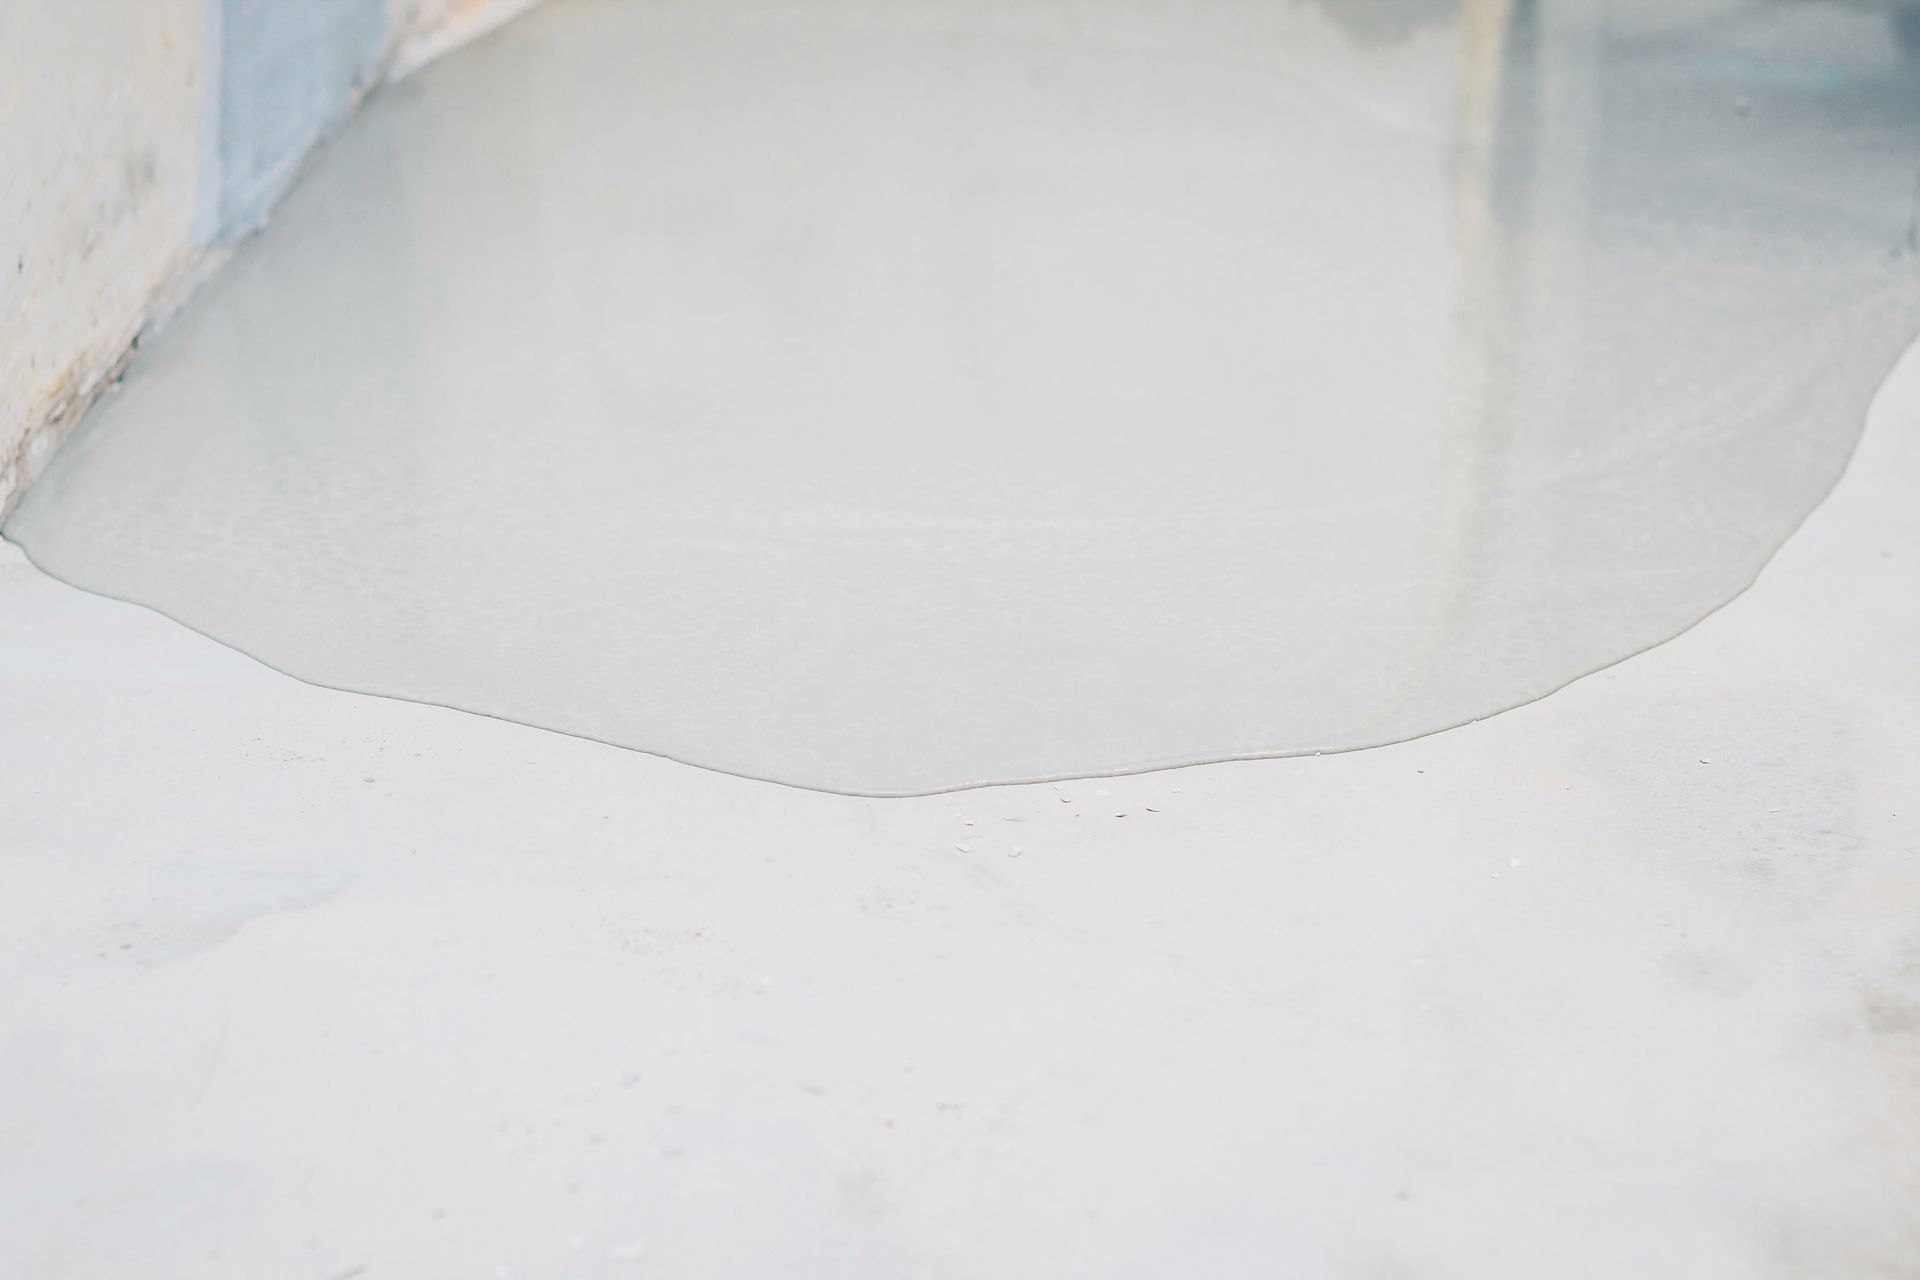
Allow Sufficient Drying Time:
After applying the floor coating, it's crucial to allow sufficient drying time before returning items to the garage or subjecting the floor to heavy use. This typically involves waiting at least 24 to 48 hours for the coating to cure fully. During this time, avoid walking on the coated surface or placing any objects on it.
By following these steps, you can ensure that your garage is properly prepared for floor coating installation, resulting in a smooth and successful process. With a fresh coat of durable, high-quality coating, your garage floor will not only look great but also withstand the demands of daily use for years to come. So why wait? Transform your garage today and enjoy the benefits of a beautiful, functional space.
However, in recent years, a new contender has emerged on the scene: polyurea and polyaspartic coatings. These innovative coatings offer a range of benefits that set them apart from traditional epoxy, making them a superior choice for many applications. In this article, we'll explore why polyurea and polyaspartic coatings are better than epoxy and why they're gaining popularity among discerning consumers. Rapid Cure Time One of the most significant advantages of polyurea and polyaspartic coatings is their rapid cure time. Unlike epoxy, which can take several days to cure fully, polyurea and polyaspartic coatings cure in a matter of hours. This means less downtime and disruption for homeowners and businesses, allowing you to return to normal use of the space much more quickly. Enhanced Durability Polyurea and polyaspartic coatings are known for their exceptional durability and resistance to wear and tear. They can withstand heavy foot traffic, impact, abrasion, and chemical exposure better than epoxy, making them ideal for high-traffic areas such as garages, warehouses, and commercial facilities. Flexibility and Adhesion Unlike epoxy, which can be rigid and prone to cracking under certain conditions, polyurea and polyaspartic coatings offer excellent flexibility and adhesion. This allows them to move with the substrate, preventing cracking and delamination over time. Whether your floor experiences temperature fluctuations or substrate movement, polyurea and polyaspartic coatings can adapt and maintain their integrity. UV Stability Another advantage of polyurea and polyaspartic coatings is their UV stability. Unlike epoxy, which can yellow and degrade when exposed to sunlight, polyurea and polyaspartic coatings remain clear and colorfast, even in outdoor applications. This makes them an excellent choice for patios, pool decks, and other exterior surfaces. Moisture Tolerance Polyurea and polyaspartic coatings have superior moisture tolerance compared to epoxy. They can be applied to damp or even wet surfaces without sacrificing performance, making them ideal for environments where moisture is present, such as basements, bathrooms, and kitchens. Fast Installation Process Thanks to their rapid cure time and simple application process, polyurea and polyaspartic coatings can be installed much more quickly than epoxy. This means less time spent waiting for the coating to cure and more time enjoying your newly coated floors. Low Odor and VOCs: Polyurea and polyaspartic coatings are formulated to be low odor and low in volatile organic compounds (VOCs), making them safer and more environmentally friendly than many epoxy formulations. This makes them a preferred choice for indoor applications where air quality is a concern. Customization Options Like epoxy, polyurea and polyaspartic coatings offer a wide range of colors, finishes, and decorative effects to suit your aesthetic preferences. Whether you prefer a solid color, metallic finish, or decorative chip broadcast, there's a polyurea or polyaspartic coating option to match your vision. In conclusion, polyurea and polyaspartic coatings offer a host of benefits that make them a superior choice to epoxy for many applications. From their rapid cure time and enhanced durability to their flexibility, UV stability, and moisture tolerance, polyurea and polyaspartic coatings outshine epoxy in virtually every aspect. Whether you're coating a garage floor, a commercial facility, or an outdoor patio, polyurea and polyaspartic coatings provide a high-performance solution that delivers lasting beauty and protection.
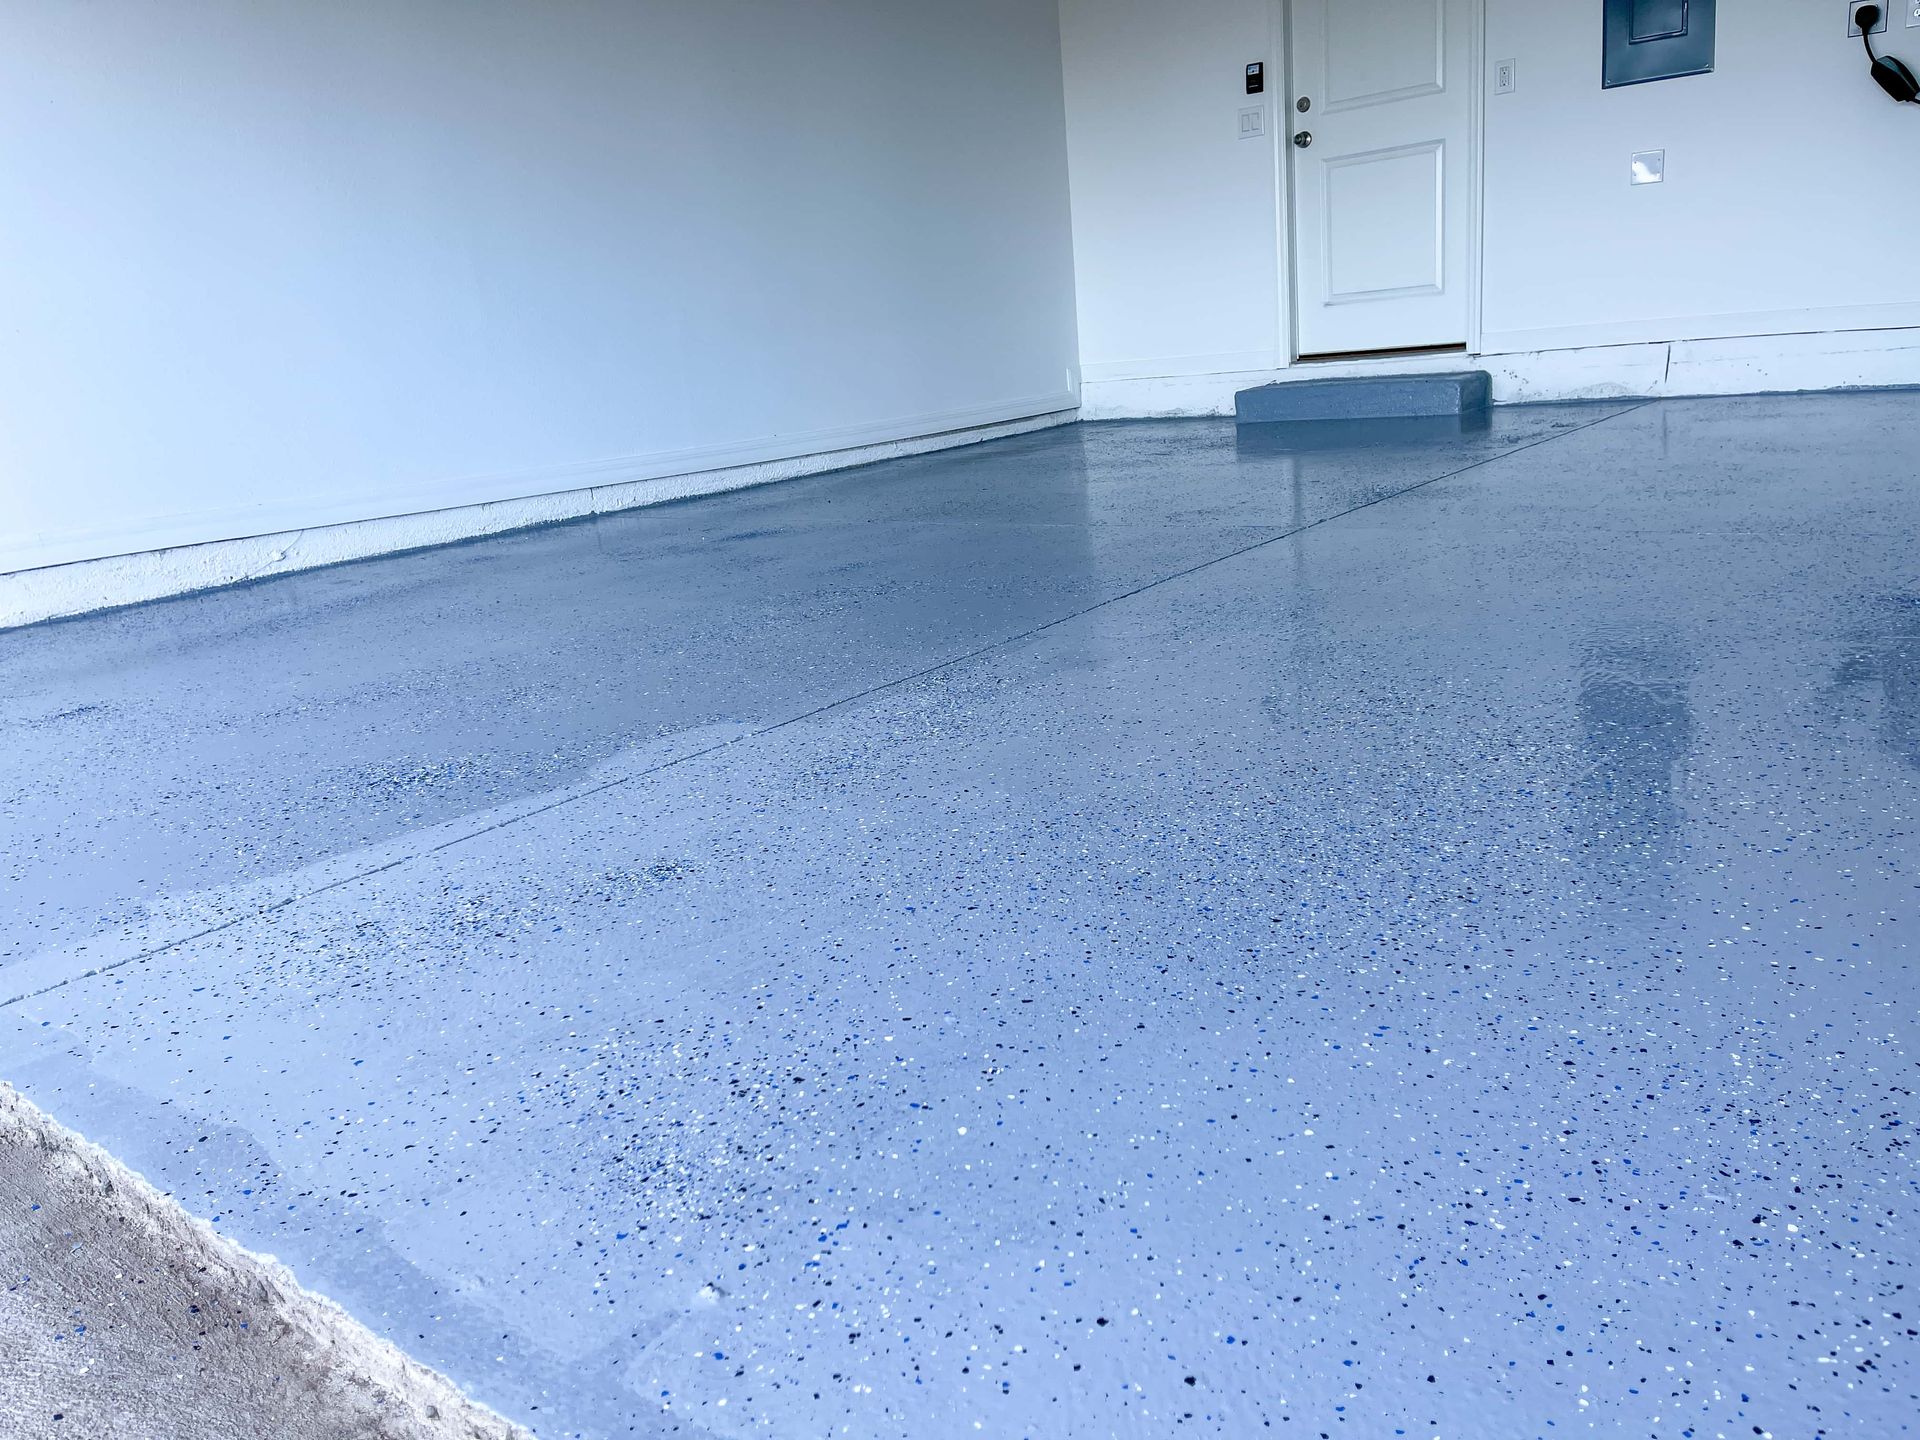
That's where textured floor coatings step in, offering a whole new dimension to your surfaces. From adding depth to enhancing safety, textured coatings are a versatile solution that deserves a closer look. In this exploration, we'll delve into the world of textured floor coatings, uncovering how they can transform your spaces and elevate your aesthetic. Enhanced Traction: One of the primary benefits of textured floor coatings is improved traction. Whether you're walking, driving, or working on the surface, texture provides grip and stability, reducing the risk of slips and falls. This makes textured coatings ideal for areas prone to moisture or spills, such as garages, workshops, or commercial kitchens. Visual Interest: Texture adds visual interest and depth to your floors, breaking up monotony and creating visual focal points. Whether you opt for a subtle texture that adds a hint of dimension or a bold pattern that makes a statement, textured coatings allow you to customize the look of your space to suit your style. Concealing Imperfections: Got cracks, pits, or other surface imperfections? Textured floor coatings can help disguise these flaws, providing a smooth and uniform appearance. By filling in gaps and irregularities, textured coatings create a seamless surface that looks polished and professional. Durable Protection: Beyond aesthetics, textured coatings offer durable protection for your floors. Many textured coatings are formulated with tough, resilient materials that resist damage from heavy foot traffic, abrasion, and impact. This makes them an excellent choice for high-traffic areas that require long-lasting durability. Customization Options: Textured floor coatings come in a variety of textures, patterns, and colors, allowing you to tailor the look to your preferences. From subtle textures that mimic natural materials like stone or wood to bold patterns that make a statement, the options are virtually limitless. Whether you're going for a rustic, industrial, or contemporary vibe, there's a textured coating to suit your style. Ease of Maintenance: Despite their rugged appearance, textured floor coatings are surprisingly easy to maintain. Their textured surface helps hide dirt, dust, and debris, requiring less frequent cleaning than smooth floors. When it's time to clean, simply sweep or mop the surface as needed, and your floors will look as good as new. Application Versatility: Textured floor coatings can be applied to a wide range of surfaces, including concrete, wood, and tile. Whether you're refreshing your garage floor, updating your patio, or revamping your interior spaces, textured coatings offer a versatile solution that can be customized to suit your needs. Professional Installation: While some DIY enthusiasts may attempt to apply textured coatings themselves, for the best results, it's often advisable to enlist the help of a professional. Professional installers have the expertise and equipment to ensure proper surface preparation, application, and finishing, resulting in a flawless finish that will stand the test of time. In conclusion, textured floor coatings offer a myriad of benefits, from enhanced traction and visual interest to durable protection and ease of maintenance. Whether you're looking to add depth to your garage, elevate your outdoor living spaces, or revitalize your interior floors, textured coatings provide a versatile solution that can transform any surface into a work of art. So why settle for ordinary floors when you can have extraordinary ones? Explore the world of textured coatings and discover the endless possibilities for enhancing your spaces.
Environmental factors like temperature and humidity play a crucial role in determining the success of your project. Understanding how these elements impact the application process can make all the difference between a flawless finish and a frustrating redo. In this guide, we'll delve into the impact of temperature and humidity on floor coating application and explore best practices to ensure optimal results. Temperature Matters: Temperature can significantly affect the viscosity and curing time of floor coatings. Most coatings have specific temperature ranges within which they can be applied effectively. Generally, temperatures between 50°F to 90°F (10°C to 32°C) are ideal for most floor coatings. Extreme temperatures can cause issues such as poor adhesion, uneven drying, or even premature curing. Consider Cure Time: Keep in mind that higher temperatures can accelerate the curing process, while lower temperatures can slow it down. It's crucial to choose a time for application when the temperature is within the recommended range and stable for the duration of the curing process. This ensures that the coating has sufficient time to level and cure properly, resulting in a durable finish. Watch Out for Humidity: Humidity levels also play a significant role in floor coating application. High humidity can extend drying times and affect the coating's ability to bond to the substrate properly. On the other hand, low humidity can cause coatings to dry too quickly, leading to issues like blushing or surface imperfections. Aim for humidity levels between 40% to 60% for optimal results. Plan for Ventilation: Proper ventilation is essential during floor coating application to ensure adequate airflow and to help control humidity levels. If possible, open windows and doors to promote air circulation. However, be cautious of introducing dust or debris into the workspace. In some cases, using fans or dehumidifiers may be necessary to maintain optimal conditions. Test Conditions: Before diving into a large-scale floor coating project, it's a good idea to conduct a small test application under similar temperature and humidity conditions. This allows you to gauge how the coating performs in your specific environment and make any necessary adjustments to your application technique or timing. Follow Manufacturer Recommendations: Always refer to the manufacturer's guidelines and product data sheets for specific recommendations regarding temperature and humidity conditions for application. They often provide detailed instructions and tips to help you achieve the best possible results. Be Flexible with Timing: Sometimes, Mother Nature doesn't cooperate with our project schedules. If you encounter unexpected changes in temperature or humidity, be prepared to adjust your plans accordingly. It may mean delaying the project until conditions improve or taking extra precautions to mitigate the impact of adverse weather. Monitor Conditions Throughout: Throughout the application process, continue to monitor temperature and humidity levels to ensure they remain within the recommended ranges. This may require periodic checks using a thermometer and hygrometer. Adjust ventilation or other environmental controls as needed to maintain optimal conditions. By understanding the impact of temperature and humidity on floor coating application and implementing best practices, you can maximize the chances of achieving a flawless finish that not only looks great but also stands the test of time. So, the next time you're gearing up for a floor coating project, don't overlook the importance of environmental conditions. With the right approach, you can set yourself up for success from the get-go.
While floor coatings are commonly associated with garage floors, driveways, and industrial settings, their versatility extends far beyond these traditional applications. As advancements in coating technology continue to evolve, innovative uses for floor coatings have emerged, offering homeowners and businesses creative solutions for enhancing various surfaces. Patio and Outdoor Living Spaces: Transforming outdoor concrete surfaces such as patios, decks, and pool surrounds with floor coatings can enhance their appearance and durability. UV-resistant coatings provide protection against fading and discoloration from sunlight, while slip-resistant additives ensure safety in wet conditions. With a wide range of colors, textures, and decorative effects available, homeowners can create custom outdoor spaces that complement their landscaping and lifestyle. Basement Floors: Basements often suffer from dampness, moisture, and subfloor imperfections, making them challenging to finish. Floor coatings offer a practical solution for basement flooring, providing a seamless, waterproof surface that resists moisture intrusion and mold growth. Epoxy and polyurea coatings are particularly well-suited for basement floors, offering durability, easy maintenance, and customizable aesthetics. Retail and Commercial Spaces: Floor coatings play a vital role in enhancing the aesthetics and functionality of retail and commercial spaces. From restaurants and cafes to boutiques and galleries, coated concrete floors offer a sleek, modern look that is both durable and easy to clean. Metallic epoxy coatings, in particular, can add a touch of sophistication and luxury to retail interiors, creating eye-catching focal points that draw customers in. Workshops and Studios: Garage floor coatings are not just for parking cars; they also make ideal surfaces for workshops, studios, and hobby spaces. Durable epoxy coatings provide a seamless, non-porous surface that resists stains, spills, and chemical damage, making them perfect for woodworking, crafting, and DIY projects. Additionally, the high-gloss finish of epoxy coatings enhances lighting and visibility in these spaces, creating a bright, inviting atmosphere. Showrooms and Event Spaces: Floor coatings offer a versatile solution for transforming showrooms, event spaces, and exhibition halls into dynamic, eye-catching environments. Metallic epoxy coatings, with their shimmering, reflective surfaces, add drama and sophistication to showroom floors, highlighting products and attracting attention. Temporary event flooring systems, such as polyurethane coatings with custom graphics or logos, provide a quick and easy way to brand and customize event spaces for special occasions. Outdoor Sports Courts: Floor coatings are revolutionizing outdoor sports courts, providing durable, low-maintenance surfaces for basketball, tennis, and pickleball courts. Polyurethane coatings offer excellent traction and ball bounce characteristics, enhancing the performance and safety of outdoor sports surfaces. With customizable color options and court markings, floor coatings allow sports facilities to create unique, branded court designs that stand out on the court. As the demand for innovative, sustainable design solutions continues to grow, floor coatings are emerging as a versatile tool for transforming a wide range of surfaces. From outdoor living spaces and basements to retail interiors and sports courts, the applications of floor coatings extend far beyond traditional settings. With their durability, customization options, and aesthetic appeal, floor coatings offer endless possibilities for enhancing and revitalizing spaces in residential, commercial, and recreational environments.

Embarking on a floor coating project is an exciting endeavor, but it's essential to understand the intricacies of the drying and curing process to achieve optimal results. Join us as we delve into the drying and curing process of floor coatings, unraveling the mystery and guiding you through what to expect. Before we dive in, let's clarify the difference between drying and curing: Drying - Drying refers to the evaporation of solvents or water from the coating material. During this stage, the coating undergoes a physical change as the solvent or water content dissipates, leaving behind a solid film. While drying typically occurs relatively quickly, it's important to note that the coating may still be vulnerable to damage until it completes the curing process. Curing - Curing, on the other hand, is the chemical process by which the coating undergoes polymerization and cross-linking to achieve its final hardness, durability, and chemical resistance. This process may take longer than drying and is influenced by factors such as temperature, humidity, and coating chemistry. Factors Influencing Drying and Curing, these are several factors can influence the drying and curing process of floor coatings: Temperature - Temperature plays a crucial role in both drying and curing. Higher temperatures generally accelerate drying and curing times, while lower temperatures can slow them down. It's essential to maintain the recommended temperature range for optimal results. Humidity - Humidity levels can impact drying and curing by affecting the evaporation rate of solvents and water. High humidity can prolong drying times and interfere with proper curing, while low humidity may accelerate drying but could lead to surface defects. Air Circulation - Adequate air circulation is essential for promoting drying and curing. Proper ventilation helps remove evaporated solvents or water from the coating surface, facilitating faster drying and allowing for better cross-linking during curing. Substrate Conditions - The condition of the substrate can also influence drying and curing. A clean, dry substrate promotes better adhesion and can help ensure uniform drying and curing of the coating. Now that we understand the basics, let's explore what to expect during the drying and curing process of floor coatings: Initial Drying - After application, the coating will undergo an initial drying stage where solvents or water evaporate, leaving behind a tack-free surface. Depending on environmental conditions and coating chemistry, this stage may take anywhere from a few hours to several days. Cure Induction Period - Following initial drying, the coating enters a cure induction period where chemical reactions begin to occur, initiating the curing process. During this time, the coating may continue to harden and develop its final properties. Full Cure - The final stage of the curing process is full cure, where the coating reaches its maximum hardness, durability, and chemical resistance. This stage may take several days to weeks, depending on the type of coating and environmental conditions. To ensure successful drying and curing of floor coatings, consider the following best practices: Follow Manufacturer Guidelines - Always adhere to the manufacturer's instructions regarding drying and curing times, as well as recommended environmental conditions for application. Monitor Environmental Conditions - Continuously monitor temperature and humidity levels throughout the drying and curing process to maintain optimal conditions. Avoid Foot Traffic - Minimize foot traffic and avoid placing heavy objects on the coated surface until the coating has fully cured to prevent damage or surface defects. Allow Sufficient Time - Be patient and allow sufficient time for the coating to dry and cure fully before subjecting it to heavy use or harsh conditions. Understanding the drying and curing process of floor coatings is essential for achieving successful results in your projects. By knowing what to expect and following best practices, you can ensure that your floor coatings not only look great but also provide long-lasting durability and performance. At Alpharetta Garage Floor, we're here to support you every step of the way with premium products and expert guidance. Contact us today to learn more about how we can help you achieve the perfect finish for your garage floors!
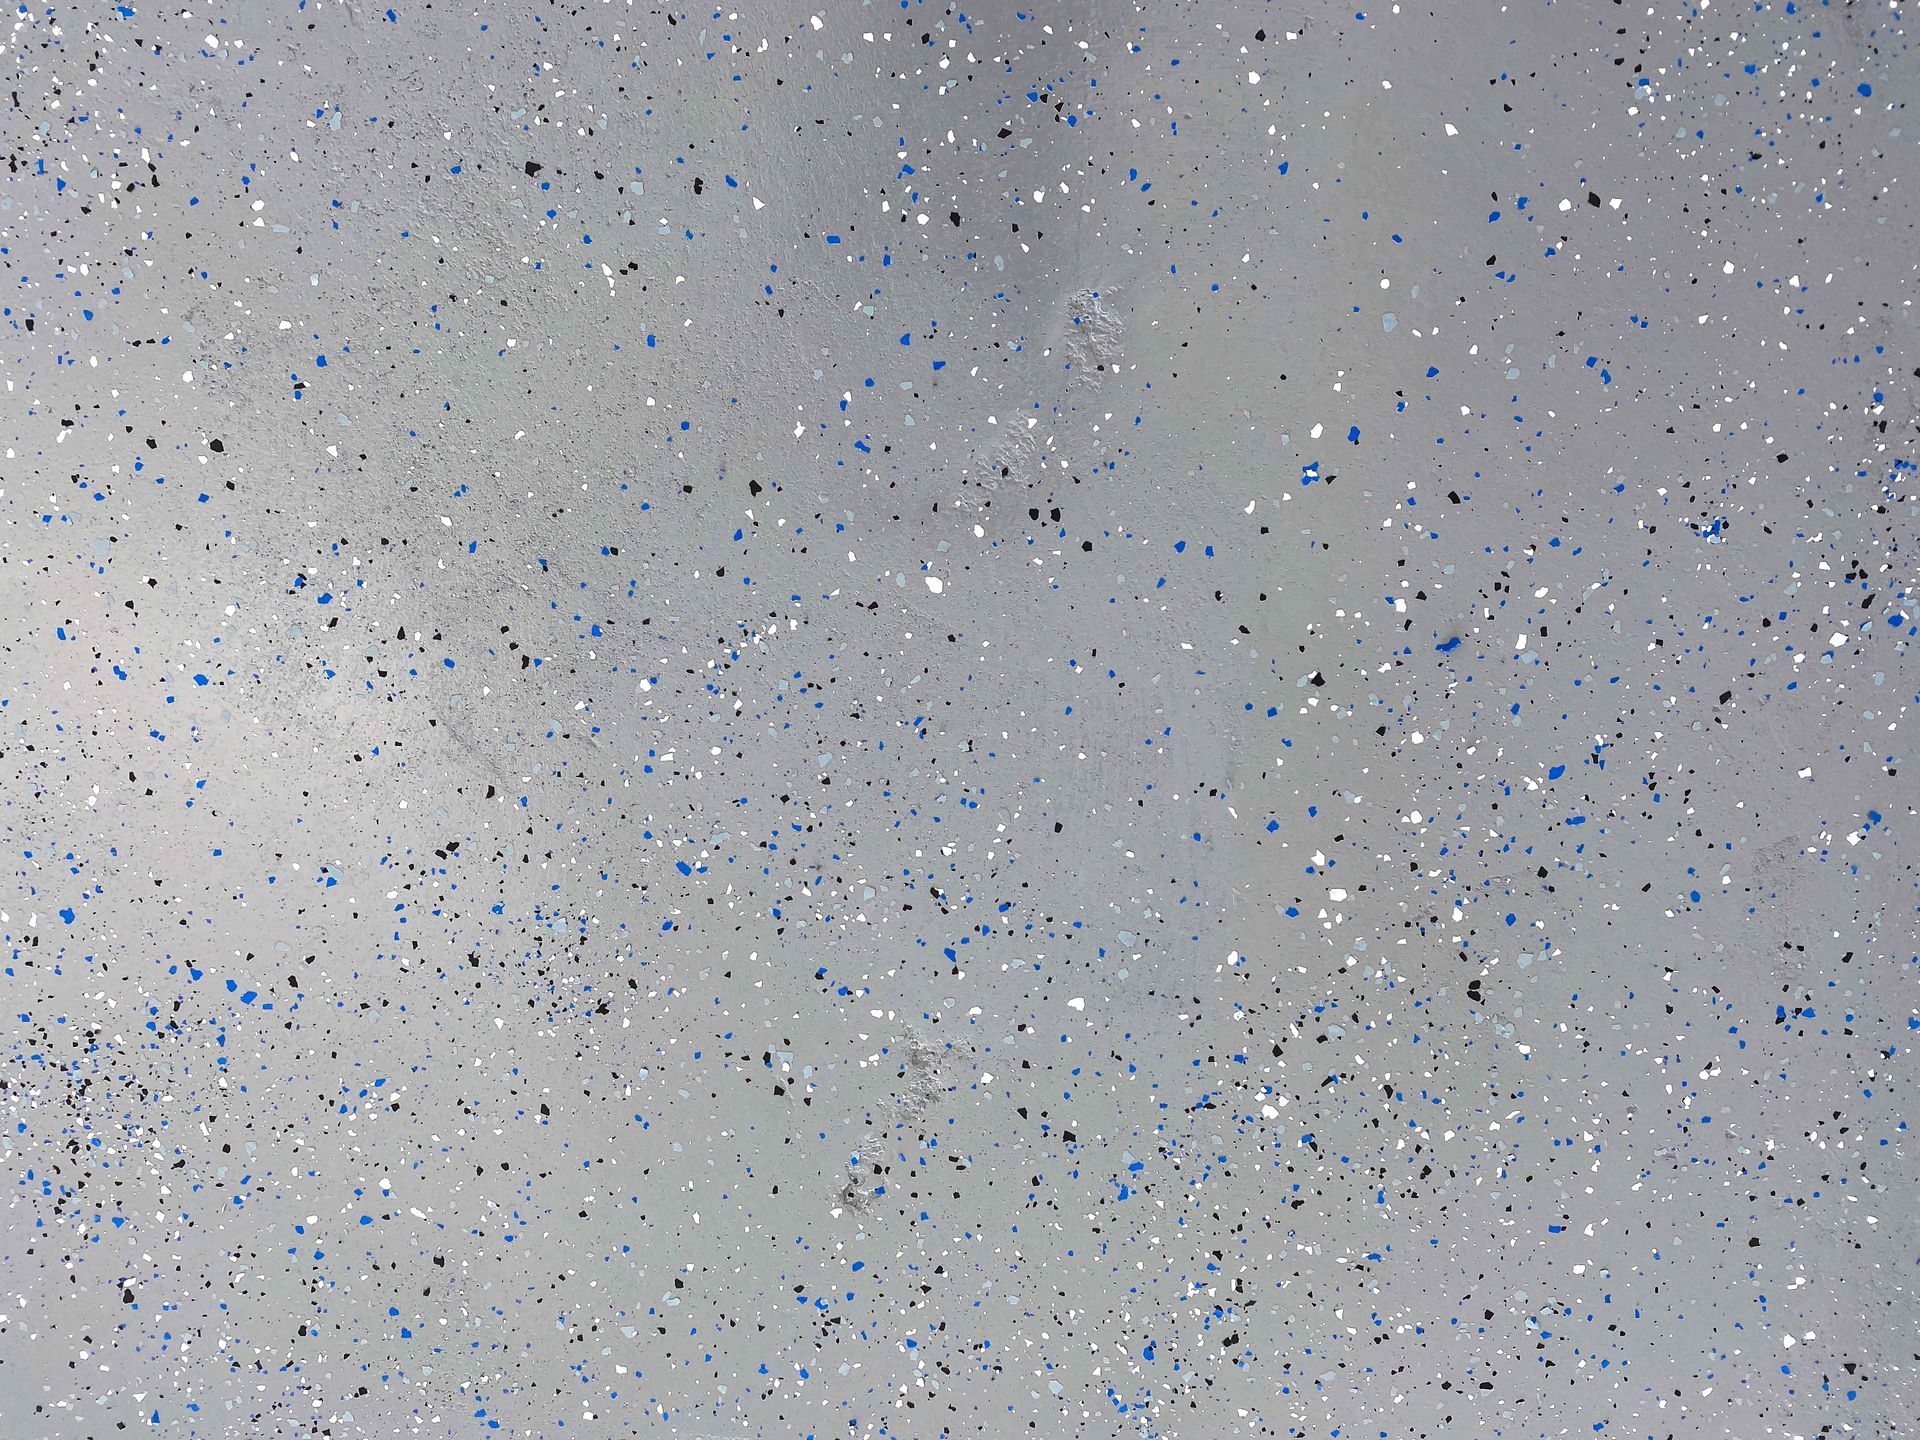
Whether you're coating your garage floor, patio, or basement, selecting colors that complement your style and preferences is key to achieving the desired look. In this blog post, we'll share some valuable tips to help you choose the perfect colors for your floor coatings and create a space that reflects your personality and taste. Consider the Space: Before selecting colors for your floor coatings, consider the function and purpose of the space. Are you coating a high-traffic area like a garage or a more relaxed environment like a patio? The intended use of the space can influence your color choices. For example, lighter colors may be preferable for areas where cleanliness is a priority, while darker colors can add warmth and sophistication to more intimate spaces. Reflect on Your Style: Think about your personal style and the overall aesthetic you want to achieve in the space. Are you drawn to modern, minimalist designs, or do you prefer more traditional or rustic elements? Consider how the colors of your floor coatings will complement your existing decor and furnishings. Look for inspiration in magazines, websites, or home improvement stores to help you visualize different color palettes and combinations. Take Lighting into Account: Lighting plays a significant role in how colors appear in a space. Natural light can enhance bright, vibrant colors, while artificial light may affect how colors are perceived. Before making a decision, consider the amount and type of lighting in the room where the floor coatings will be applied. Test samples of different colors under various lighting conditions to see how they look throughout the day. Balance Boldness with Neutrals: While bold, eye-catching colors can make a statement, they may not be suitable for every space. If you're considering bold colors for your floor coatings, balance them with neutral tones to prevent overwhelming the room. For example, you could opt for a neutral base color with pops of bold accent colors in strategic areas. This approach allows you to inject personality and flair into the space while maintaining visual harmony. Think Long-Term: When choosing colors for your floor coatings, think about the long-term impact of your decision. Trends come and go, so consider whether the colors you choose will stand the test of time or quickly become outdated. Neutral colors like gray, beige, or taupe are timeless and versatile, making them a safe choice for those who prefer a classic look. If you're drawn to more vibrant colors, consider using them as accent colors that can be easily updated or changed in the future. Consult with Professionals: If you're unsure about which colors to choose for your floor coatings, don't hesitate to seek guidance from professionals. Floor coating experts can offer valuable advice based on their experience and expertise. They can help you explore different color options, provide samples for testing, and offer recommendations based on your preferences and the specifics of your space. In conclusion, choosing the right colors for your floor coatings is an important step in creating a space that reflects your style and personality. By considering the function of the space, reflecting on your personal style, taking lighting into account, balancing boldness with neutrals, thinking long-term, and consulting with professionals, you can select colors that enhance the beauty and ambiance of your space. If you need assistance with choosing colors or applying floor coatings, don't hesitate to contact Alpharetta Garage Floor. Our team is here to help you bring your vision to life and create a space that you'll love for years to come.
As the summer sun shines brightly and outdoor activities beckon, it's essential to ensure that your coated outdoor spaces are ready to withstand the seasonal elements. In this blog post, we'll share some essential maintenance tips to help you protect and preserve your coated outdoor surfaces throughout the summer months. Regular Cleaning The first step in summer maintenance for coated outdoor spaces is regular cleaning. Sweep or use a leaf blower to remove debris such as leaves, dirt, and grass clippings from the surface. For more stubborn dirt or stains, use a mild detergent and water solution to scrub the floor gently. Avoid harsh chemicals or abrasive cleaners, as these can damage the coating. Preventative Measures Take proactive measures to prevent damage to your coated outdoor surfaces. Place doormats at entry points to capture dirt and debris before they can be tracked onto the floor. Use furniture pads or coasters to prevent scratches and scuffs from patio furniture. Additionally, consider applying a fresh coat of sealant to the floor to provide an extra layer of protection against UV rays and moisture. Monitor for Damage Keep an eye out for any signs of damage or wear and tear on your coated outdoor surfaces. Check for areas where the coating may be peeling, chipping, or cracking, as these can compromise the integrity of the floor. Address any issues promptly to prevent further damage and maintain the longevity of the coating. Avoid Standing Water Standing water can be damaging to coated outdoor surfaces, especially in areas with poor drainage or frequent rain. Ensure that water is able to drain away from the floor properly to prevent pooling or puddling. Use a squeegee or mop to remove excess water after rain showers, and consider installing a drain or slope the floor to facilitate drainage. Protect Against UV Damage The summer sun can be harsh on outdoor surfaces, causing colors to fade and coatings to degrade over time. To protect against UV damage, consider applying a UV-resistant sealant or coating to your outdoor floors. This will help to preserve the color and integrity of the coating, keeping your floors looking great for longer. Schedule Professional Maintenance Finally, consider scheduling professional maintenance for your coated outdoor surfaces to ensure optimal performance and longevity. A professional service provider can inspect the floor for any signs of damage, perform necessary repairs or touch-ups, and apply a fresh coat of sealant as needed. This proactive approach can help to extend the life of your coated outdoor surfaces and keep them looking their best year after year. In conclusion, summer maintenance is essential for keeping your coated outdoor spaces looking great and performing their best. By following these simple tips, you can protect and preserve your floors throughout the summer months, ensuring that they remain durable, attractive, and functional for years to come. If you need assistance with maintenance or repairs for your coated outdoor surfaces, don't hesitate to contact Alpharetta Garage Floor. Our team of experts is here to help you keep your floors in top condition so you can enjoy your outdoor space to the fullest this summer.
When it comes to investing in floor coating services for your home or business, a well-coated floor not only enhances aesthetics but also provides durability and protection against wear and tear. However, not all floor coating services are created equal, and it's essential to consider the warranty and guarantee offered by your chosen provider. In this blog post, we'll explore why warranty and guarantee are crucial factors in floor coating services and what to look for when selecting a provider. Peace of Mind A comprehensive warranty and guarantee offer peace of mind to homeowners and business owners alike. Knowing that your floor coating is backed by a warranty means that you can trust in the quality of the workmanship and materials used. It also provides assurance that in the unlikely event of issues or defects, the provider will take responsibility and rectify the situation, often at no additional cost to you. Quality Assurance A reputable floor coating service will stand behind its work with a robust warranty and guarantee. This demonstrates their commitment to delivering high-quality results that meet or exceed industry standards. Before engaging a provider, inquire about the specifics of their warranty, including the duration of coverage and what is included. Look for warranties that offer comprehensive protection against common issues such as peeling, chipping, or discoloration. Long-Term Investment Floor coating is an investment in the long-term durability and aesthetics of your space. A warranty and guarantee provide assurance that your investment is protected for years to come. By choosing a provider that offers a substantial warranty, you can enjoy peace of mind knowing that your floors will remain in top condition for an extended period, without the need for costly repairs or replacements. Expertise and Experience A provider that offers a robust warranty and guarantee typically has the expertise and experience necessary to deliver exceptional results. Before selecting a floor coating service, research their reputation and track record in the industry. Look for providers with a proven history of delivering high-quality workmanship and customer satisfaction. Additionally, inquire about the qualifications and training of their technicians to ensure that they have the necessary skills to handle your project effectively. Customer Support A warranty and guarantee not only protect your investment but also provide access to ongoing customer support. Should you encounter any issues or have questions about your floor coating, a reputable provider will be available to assist you promptly. Whether you need advice on maintenance or require warranty service, knowing that you have reliable customer support at your disposal can provide invaluable peace of mind. Transparency and Accountability A reputable floor coating provider will be transparent about the terms and conditions of their warranty and guarantee. Before signing any agreements, carefully review the warranty documentation to ensure that you understand your rights and obligations. Look for providers that are upfront about what is covered under the warranty, as well as any exclusions or limitations. Additionally, verify that the provider has a process in place for handling warranty claims efficiently and transparently. In conclusion, when investing in floor coating services, don't overlook the importance of warranty and guarantee. These factors provide essential protections for your investment and offer peace of mind knowing that your floors are in good hands. When selecting a floor coating provider, prioritize those that offer comprehensive warranties, demonstrate expertise and experience, and provide excellent customer support. By doing so, you can enjoy the benefits of beautiful, durable floors that stand the test of time. If you're in need of floor coating services backed by a solid warranty and guarantee, look no further than Alpharetta Garage Floor. Contact us today to learn more about our comprehensive warranty coverage and discover how we can enhance the beauty and durability of your space.
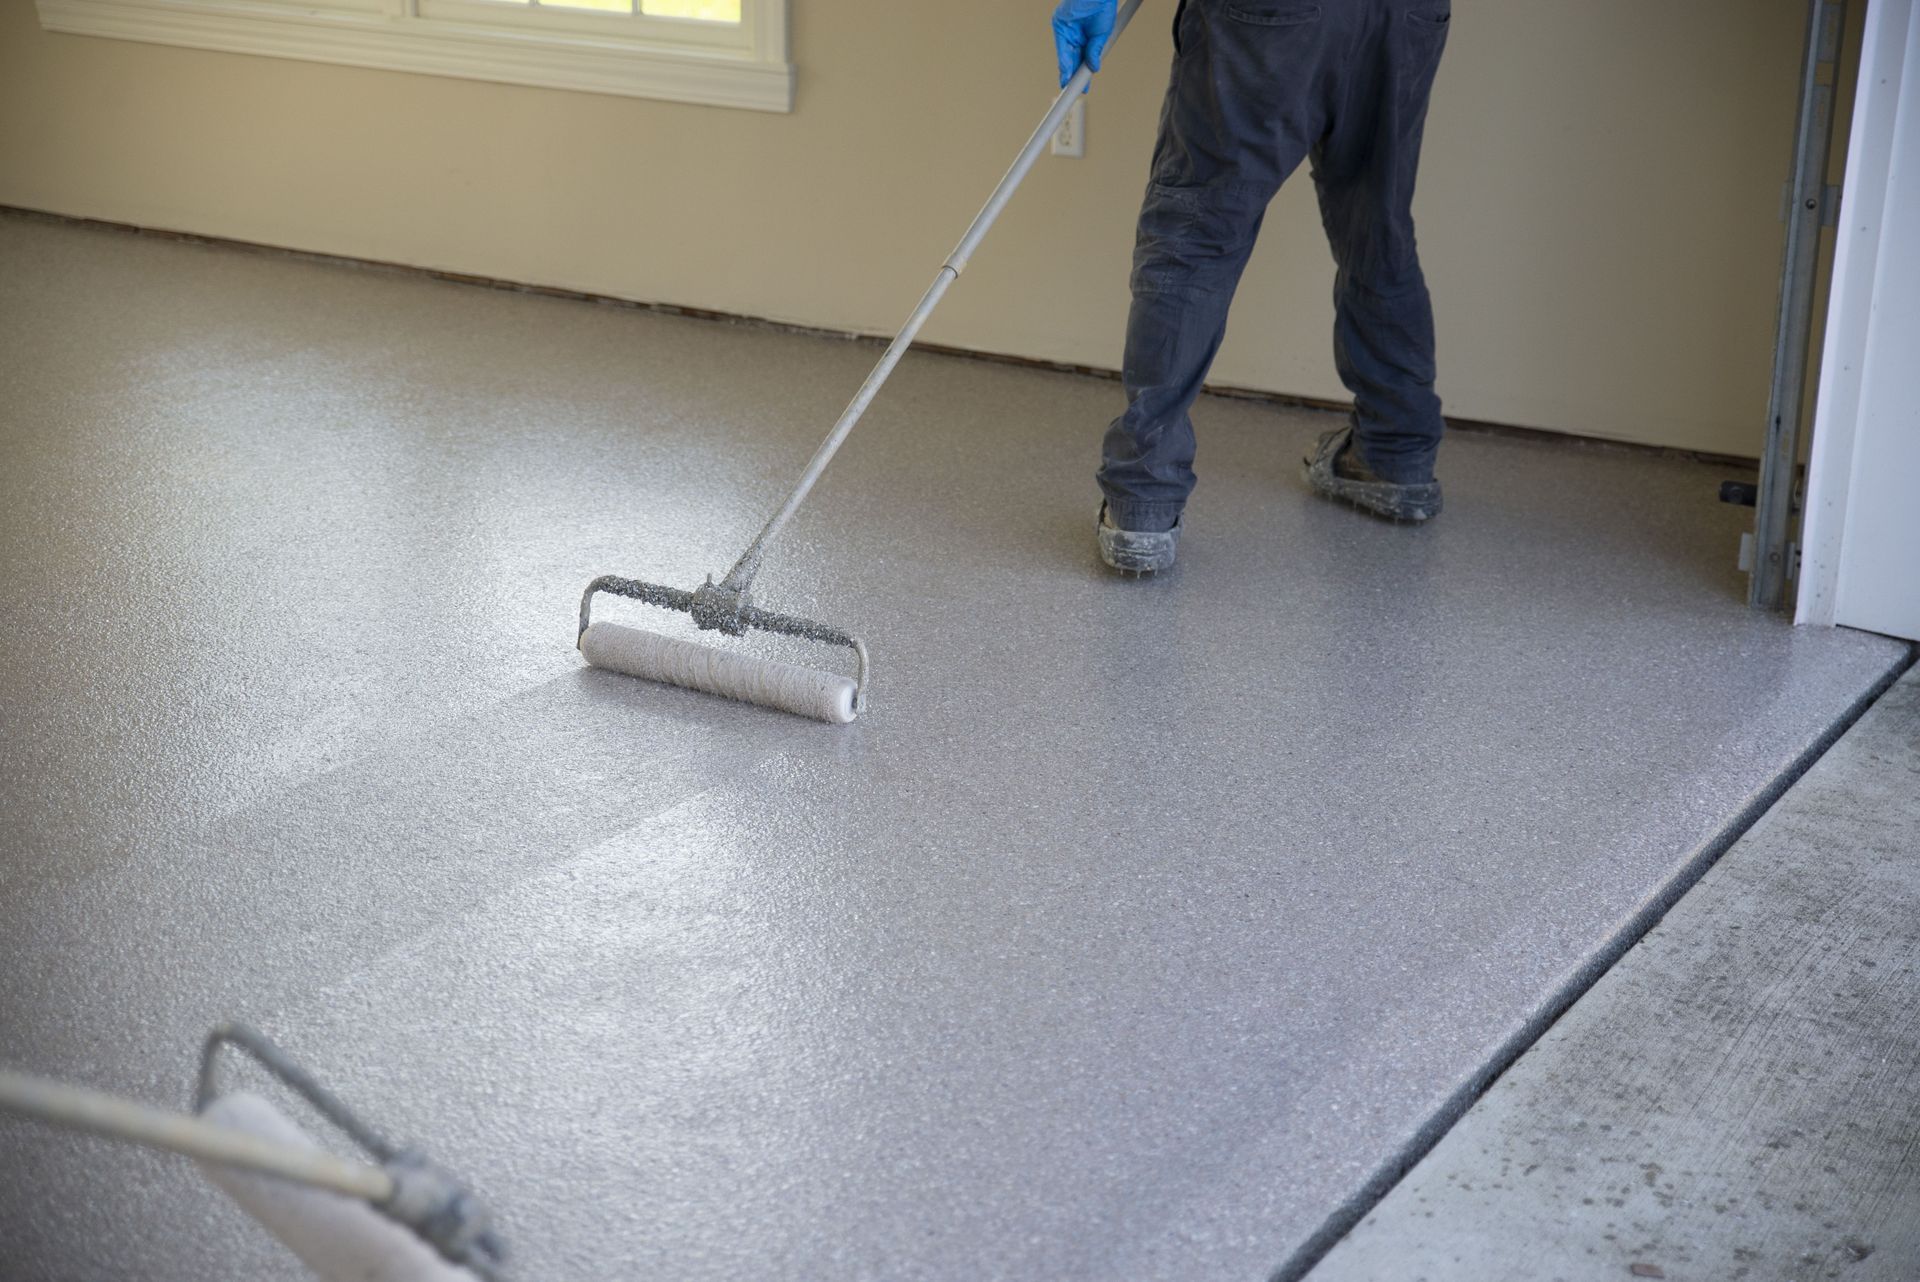
When it comes to upgrading your garage floor, you don't have to break the bank to achieve a durable, attractive finish. With the right approach and budget-friendly floor coating solutions. In this blog post, we'll explore some cost-effective options and tips for achieving professional results on a budget. 1. Consider DIY Options One of the most effective ways to save money on garage floor coatings is by opting for a do-it-yourself (DIY) approach. Many manufacturers offer DIY-friendly epoxy and acrylic coatings that are designed for easy application by homeowners. These kits typically include everything you need to complete the project, including instructions, rollers, and application tools. By tackling the project yourself, you can eliminate labor costs associated with hiring a professional contractor. With proper preparation and attention to detail, DIY garage floor coatings can yield impressive results at a fraction of the cost of professional installation. 2. Choose Cost-Effective Materials When selecting a floor coating for your garage, consider cost-effective materials that offer durability and performance without breaking the bank. Epoxy coatings are a popular choice for budget-conscious homeowners, as they provide excellent protection against stains, chemicals, and abrasions at a relatively low cost. Additionally, water-based acrylic sealers offer an affordable alternative to epoxy coatings, providing a glossy finish and enhanced resistance to wear and tear. While acrylic sealers may not offer the same level of durability as epoxy coatings, they can still provide adequate protection for moderate use garage floors at a lower price point. 3. Prioritize Surface Preparation Regardless of the type of floor coating you choose, proper surface preparation is essential for achieving long-lasting results. Invest time and effort into cleaning and preparing the garage floor before applying the coating to ensure optimal adhesion and performance. Start by thoroughly cleaning the surface to remove dirt, oil, and grease using a degreaser or concrete cleaner. Use a pressure washer or stiff-bristled brush to scrub the surface and remove any stubborn stains or contaminants. Additionally, repair any cracks or imperfections in the concrete and allow the surface to dry completely before proceeding with the coating application. 4. Optimize Application Techniques To maximize the effectiveness of your budget-friendly floor coating, pay attention to application techniques and ensure proper coverage and consistency. Follow the manufacturer's instructions carefully and use the recommended tools and equipment for the best results. When applying the coating, work methodically in small sections, and apply thin, even coats to avoid drips or puddles. Use a roller or squeegee to spread the coating evenly across the surface, and apply multiple coats as needed to achieve the desired level of coverage and durability. 5. Implement Preventive Maintenance Once the floor coating is applied, proactive maintenance can help prolong its lifespan and preserve its appearance. Regularly sweep or vacuum the garage floor to remove dirt and debris, and clean up spills promptly to prevent staining or damage to the coating. Additionally, consider investing in floor mats or protective coatings for high-traffic areas to minimize wear and tear on the surface. By implementing preventive maintenance measures, you can extend the life of your budget-friendly floor coating and keep your garage looking its best for years to come. With these budget-friendly floor coating solutions and tips, you can achieve quality results without breaking the bank. Whether you opt for a DIY epoxy kit or a water-based acrylic sealer, prioritize proper surface preparation, application techniques, and maintenance to ensure a durable, attractive finish for your garage floor. By making smart choices and investing time and effort into the project, you can enjoy a functional and stylish garage space that enhances the overall value and appeal of your home.

Are you looking for a cost-effective way to revamp your business's aesthetic appeal? Look no further than floor coatings! From retail stores to office buildings, floor coatings can transform any drab commercial space into a fab one, instantly elevating its appearance and ambiance. In this blog post, we'll explore how floor coatings can breathe new life into your commercial space and why Alpharetta Garage Floor is your go-to solution for all your coating needs. The Power of First Impressions First impressions matter, especially in the business world. When clients or customers walk into your commercial space, the first thing they notice is the overall look and feel of the environment. A worn-out, uninspired floor can leave a negative impression, while a sleek and stylish floor coating can instantly captivate and impress. With a wide range of colors, textures, and finishes available, floor coatings allow you to customize your space to reflect your brand's personality and aesthetic preferences. Durability and Longevity Commercial spaces experience heavy foot traffic, spills, and other wear and tear on a daily basis. Traditional flooring materials like concrete or tile can easily become stained, cracked, or damaged over time, leading to costly repairs and replacements. Floor coatings, on the other hand, offer unparalleled durability and longevity, providing a protective barrier that guards against scratches, stains, and impact damage. With proper maintenance, a high-quality floor coating can last for years, saving you time and money in the long run. Enhanced Safety Safety is paramount in any commercial environment. Slip-and-fall accidents are a common concern, particularly in areas prone to spills or moisture buildup. Floor coatings can help mitigate this risk by providing slip-resistant surfaces that improve traction and stability, reducing the likelihood of accidents and injuries. Additionally, many floor coatings are resistant to chemicals and other hazardous substances, making them ideal for industrial settings where safety is a top priority. Easy Maintenance Keeping your commercial space clean and presentable is essential for maintaining a positive image and ensuring customer satisfaction. Floor coatings make maintenance a breeze, thanks to their seamless, non-porous surfaces that repel dirt, dust, and liquids. Spills can be quickly wiped away with a damp cloth, and routine cleaning requires minimal effort. Unlike traditional flooring materials that require frequent waxing or polishing, floor coatings maintain their luster with simple sweeping and occasional mopping, saving you time and hassle. Environmental Benefits In today's eco-conscious world, businesses are increasingly seeking sustainable solutions that minimize their environmental footprint. Floor coatings offer several environmental benefits, including reduced energy consumption and waste generation. Many coatings are formulated using low-VOC (volatile organic compound) materials, which emit fewer harmful fumes into the atmosphere. Additionally, the reflective properties of certain coatings can help increase natural lighting in your space, reducing the need for artificial lighting and lowering energy costs. Don't let a drab floor detract from the beauty and functionality of your commercial space. Upgrade to floor coatings today and experience the difference for yourself.